Do you ever find yourself scrolling madly through your phone’s camera roll, looking for that one fabulous vacation shot you’re describing to a friend — and you can’t find it in the river of 4,000 photos? Or do you want to collect all the pictures of a child, scattered through the years, for a slide show but don’t have time to find them?
Herding pictures into sensible albums on the phone can be tedious if you bother at all, but here’s the good news: If you’ve been using the current versions of Google Photos on your Android or Apple device or Apple’s Photos for iOS, there’s a good chance that the apps have been organizing your images for you.
It can be a little unnerving to see how these apps have analyzed your pictures. But the software can save you hours and is simple to use. Here are ways to use the programs — and how to tweak them to adjust to your needs.
Method 1: Visit the Location-Based ‘Places’ Album

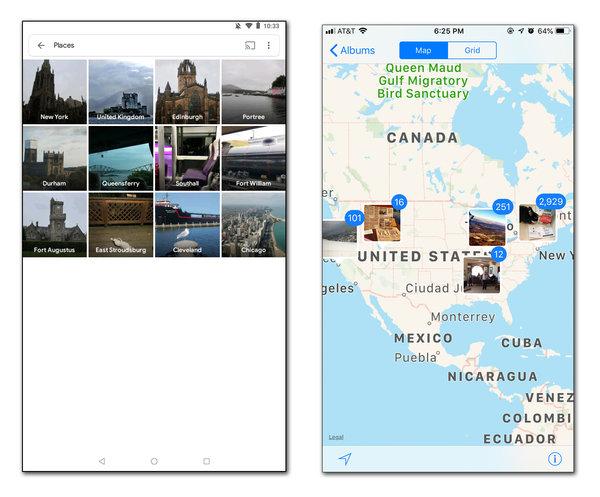
On the Albums tab in Google Photos, left, or Apple’s Photos app, right, tap the Places icon to see how the program has sorted your pictures based on the location information embedded in the file.
If your phone’s location services setting was enabled when you took the pictures, the geographical coordinates were likely embedded into the image file; this is also called “geotagging.” Tap the Albums tab in Google Photos or Apple’s Photo app to see the Places album, with pictures labeled and grouped by location. Tap a thumbnail to see all the photos taken in that spot, regardless of the date.
No GPS information in the photo file? You can add locations manually in the desktop editions of Google Photos and Apple’s Photos. Open the photo you want to tag, click the Info icon — which looks like an encircled “i” — and choose the option in the information box to edit or assign a location.
If you’re not set to sync photos with the desktop via Google’s backup and sync option or Apple’s iCloud, you can import them from the phone. Third-party apps can also edit photo location data.
Method 2: Browse the ‘People’ Album
Unless you’ve disabled the feature, Google Photos automatically groups similar faces in your photo library together with its facial recognition software. To see the groupings and label them, tap the Albums tab and go to People & Pets. Select a thumbnail to open the group and add a name. The pictures then show up when you search for that person by name in Google Photos.
Photos for iOS also collects faces found in the picture library and displays them in the “People” area on the Albums screen. You can label each group with a name by tapping a photo and using the Add Name option. To add new people in Photos for iOS, open a photo of someone, swipe up to see a thumbnail of the person in the People area and tap to enter a name.
Both apps include settings to remove someone from the People album. Tap the three-dot Options menu in the top-right corner of a person’s album to get to the controls.
Method 3: Use Keyword Search to Find Photos
Google’s and Apple’s picture programs both include a search box where you can type in keywords for people, places and things — or a year, month or date. If you have names in your People album and geotagged photos, use the app’s search box to round up results, like “Mary in Louisville in 2019.”
Even without having to add or confirm photo tags yourself, you can also search for items within images, like “wedding dress” or “concerts,” thanks to basic object and scene recognition in both apps. Keywords like “mountains” and “ocean” also bring up corresponding outdoor shots.
The object-recognition function sorts your pictures into numerous general categories, even without your having to use the search function. On the Albums tab in Google Photos, tap the “Things” thumbnails at the top of the screen to see photos grouped under general headings like “Fireworks” and “Monuments.”
Need to quickly find other types of content in your library, like videos, animated GIFs or panoramic photos? Select the Albums tab in either app and scroll to see those file types already sorted.
When you tap the Search tab, Apple’s Photos app reveals a “Categories” area. To find other groupings, tap the For You tab. Here, you can see collections including “Memories” of multiple-photo events like museum visits.


